shadows
drawing the right way
by JuliannaKunstler.com
Drawing shadows is an important part of a 3-D drawing. You need to understand the geometry behind this process to make your drawings most life-like. It is not as hard as it looks.
Drop shadow is a shape that is created by an object on a surface (or multiple surfaces) by blocking the light.
To see a drop shadow you need a light source.
in this tutorial:

shadow of a point

shadow of a line
shadow of a box

shadow of a cylinder
shadow of a cone
natural light shadow
STEPS
light
There are two types of light sources: natural (sun, moon) and artificial (lamp, candle, flash-light, etc).
natural light
Our natural light sources ( Sun and Moon) are quite far away. Building a shadow will involve some of the linear perspective elements (horizon line).
artificial (spot) light
Spot light is much closer to us. We can position it more accurately in our environment - we can tell exactly how far it is from the object and how high it is from a surface.
you need to know:
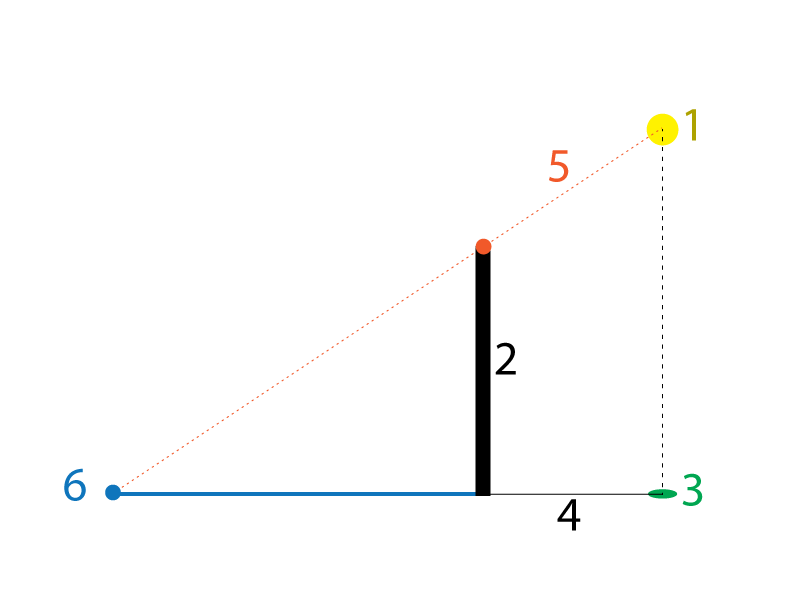
1 - Light source (yellow dot)
2 - Object
3 - Light source ground mark - position of the light source on the surface or ground (green dot)
4 - Line, connecting the position of the light source and the bottom of the object (black line)
5 - Line connecting the light source (1), the top of the object (red dot), and Line 4 - defining the end point of the drop shadow (6)
6 - The end point of the drop shadow on the surface
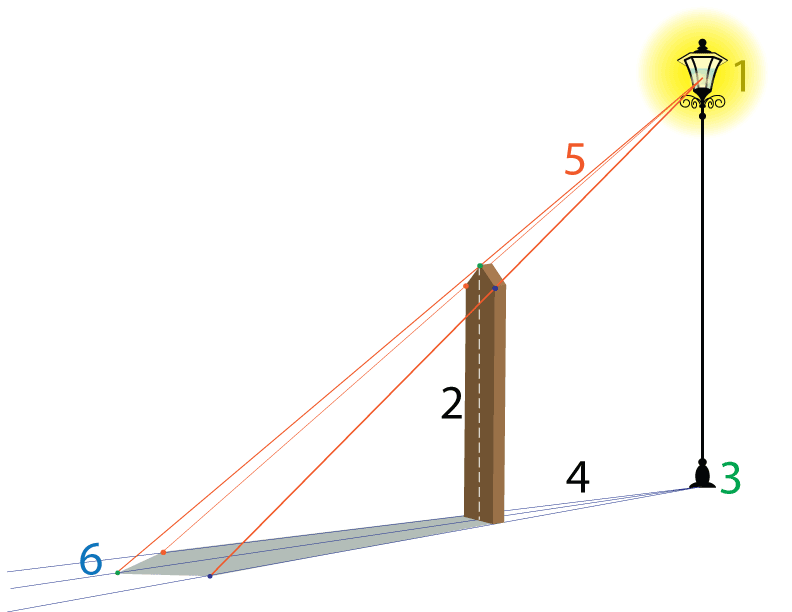
This rule is applied for both types of the light source and for all forms and objects.
There is only one difference:
diffused light source
The lines 4 are parallel as the light source is not defined (cloudy day, window, very large light source, etc) so we don't need to draw a yellow dot (1).
Lines 5 are also parallel for exactly the same reason.
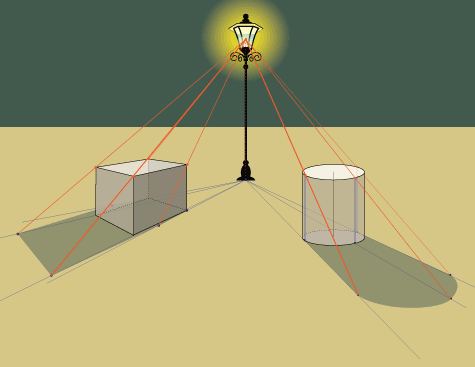
spot light
Each corner point follows the above rule to form an exact shape of the drop shadow.
spot light
shadow of a point
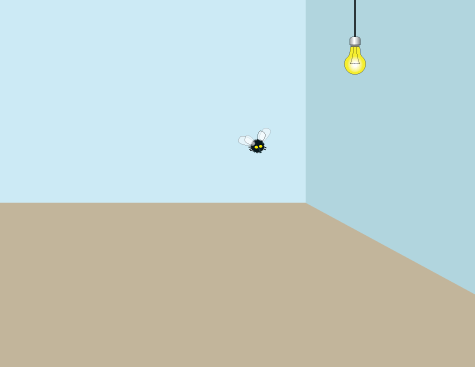
Imagine that you need to draw a drop shadow of a very small round object, almost a dot. Let's draw one of a fly. Why not?
So here we have a room with one spot light and a fly. The ground surface is the brown floor - this is where we are going to place the shadow.

The first thing you do is mark the position of the light source on the floor (light ground mark).
You do it by drawing a straight vertical line down to the floor and marking the point on the floor that is exactly below the light.
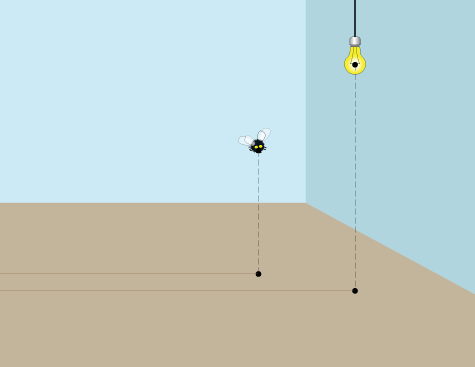
Now you need to mark the position of the fly on the floor (object ground mark).
Please note the position of the light and the fly in respect to each other - in my case, the light is closer to me than the fly (you don't need to draw the brown horizontal lines - they are just for a reference).
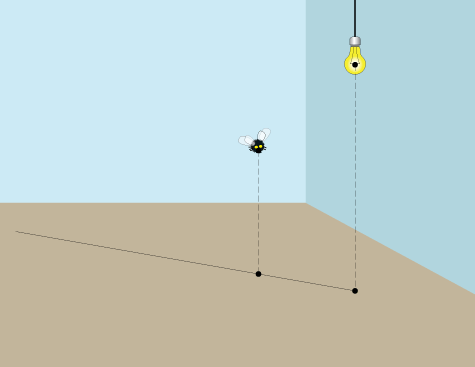
Now connect the light ground mark and the object ground mark on the floor with a line - it will define the direction of where the shadow will appear on the floor.
Great!
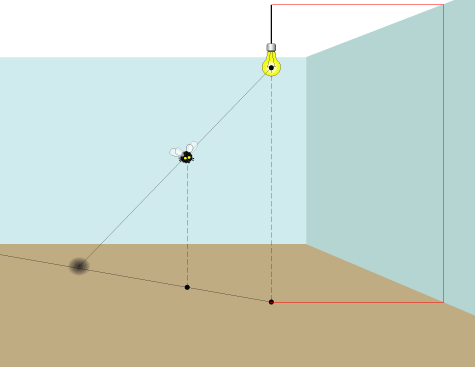
One more construction line, and you're done!
Draw a line from the light through the fly - all the way to the ground.
The intersection will mark the position of the drop shadow!
Please note:
If you have a reference point for the light source in your drawing - then you do not need to guess or estimate your ground light mark.
For example: the light source is attached to a ceiling or a wall.
shadow of a line
flat shadow
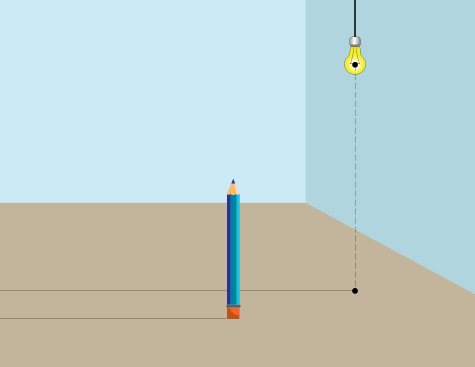
Drawing a shadow of a line is, actually, a bit easier - you don't need to define the position of the object on the floor!
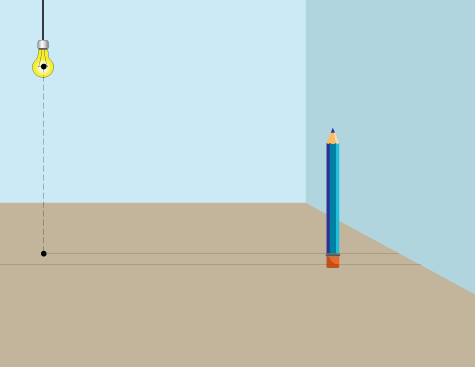
So, start, again, with defining the position of your light on the ground surface (floor) - place the light ground mark. Please note, that in this case my object (pencil) is closer to me that the light.

Connect the light ground mark with the bottom of the line (pencil, in this case).
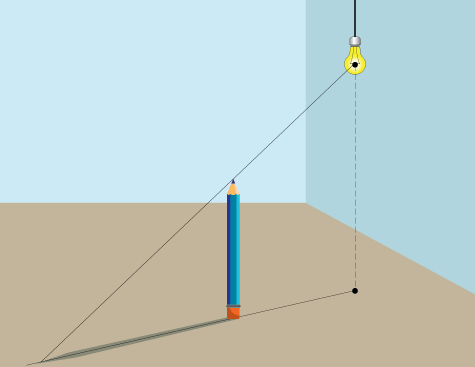
Now draw a line (light ray) from the light through the tip of the line (pencil).
That will define the length of your drop shadow.
bent shadow
In case you need to draw a shadow that falls on multiple surfaces (floor and walls) - use the same steps, just tweak them a little.
Let's say your line (another pencil) is close to the wall. The drop shadow will fall on both the floor and the wall. This is how you do it:

Just bend the line when it hits the wall!

Draw a line from the light through the top of the line (pencil) as shown:
That's it!
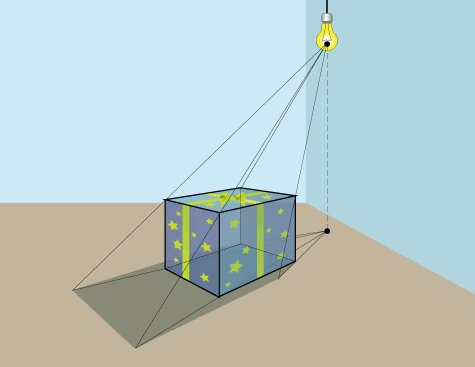
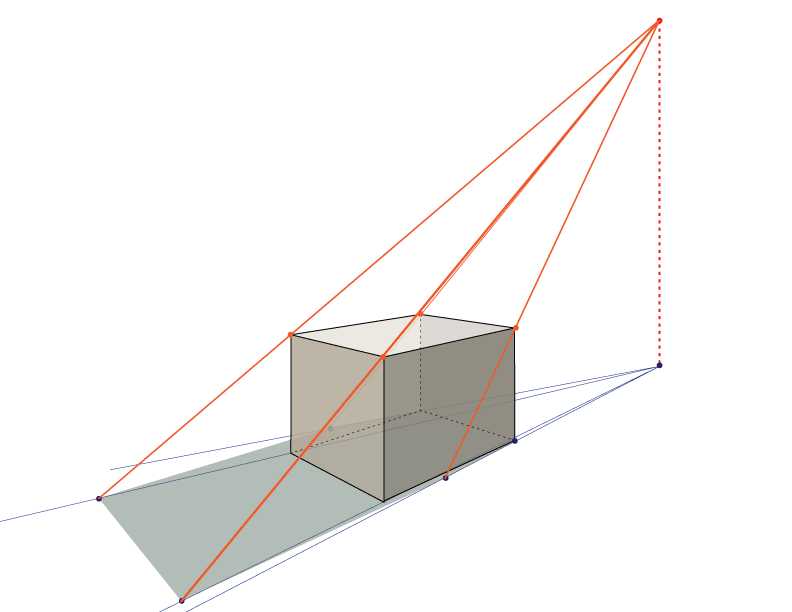
shadow of a box
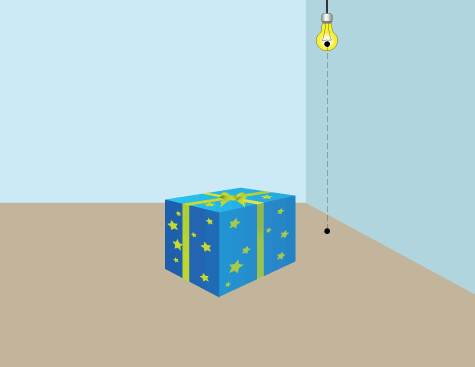
Drawing a drop shadow of a cube (box) is a repeated use of the same technique as we did with drawing s shadow of a line.
You will have to repeat the steps with all corners that form a shadow.
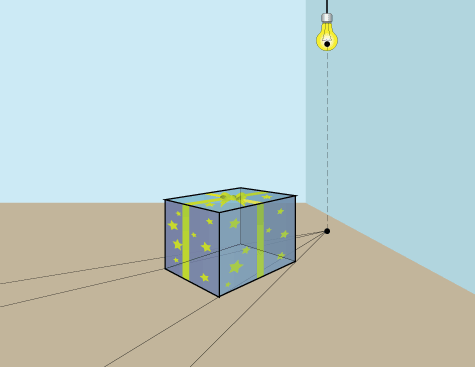
As you already know, the best way to draw 3-D forms is to draw them with "see-through sides" - as if the form is made of glass.
Connect the light ground mark with all bottom corners:
Draw lines from the light through the top corners of the box.
The intersections are the points that form a shadow shape. All you have to do now is to connect the dots!
shadow of a cylinder
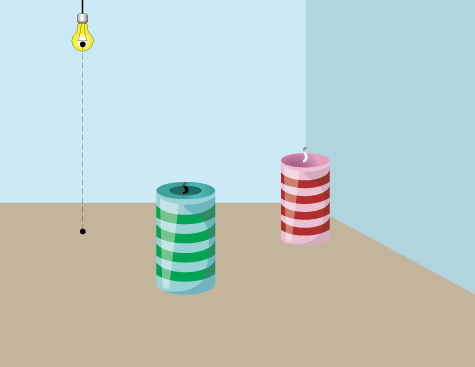
The same technique is used to draw a shadow of a cylinder, with a few minor adjustments.
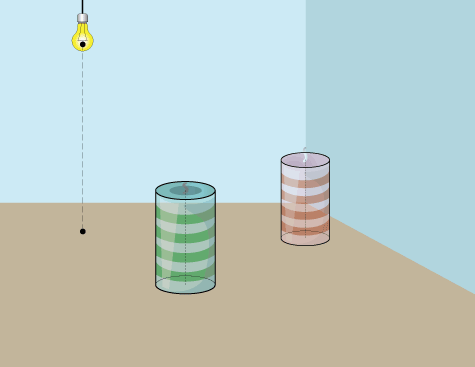
Keep all construction lines (axis of symmetry, ovals):

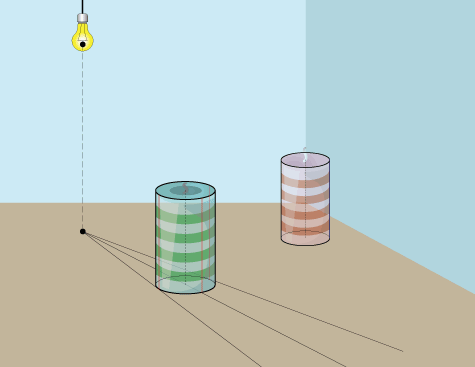
Draw lines from the light ground mark through the widest parts of the bottom oval:

Also, draw a line through the bottom of the axis of symmetry.
Draw vertical lines from the bottom ovals to the top ovals as shown.
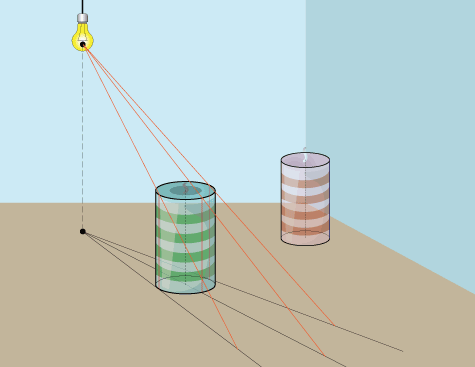
Draw lines from the light through the top oval's dimension points like this:
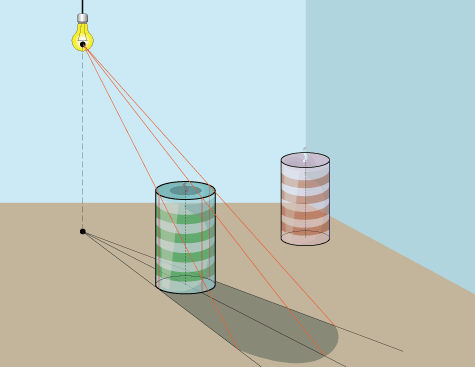
Time to trace the shadow. The two sides are straight lines that follow the ground lines. The middle (axis) projection is the furthest point of the shadow. Connect the three dots with a curve.
Drawing a shadow of a cylinder on multiple surfaces is like drawing a shadow of a line on multiple surfaces:
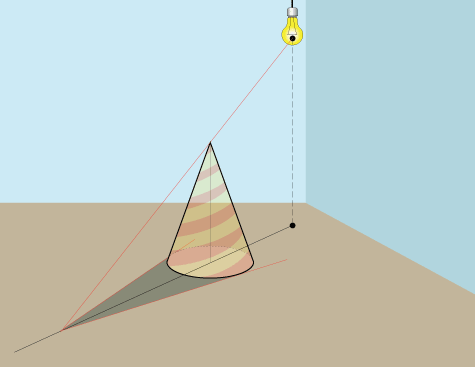
shadow of a cone
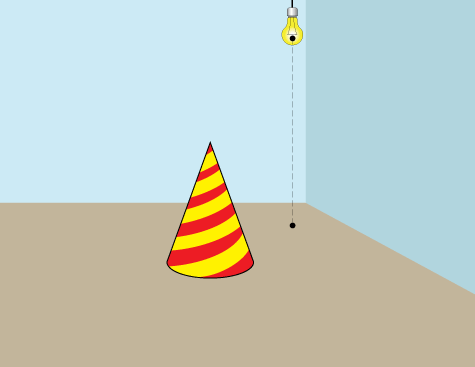
Start with placing a cone on the floor.
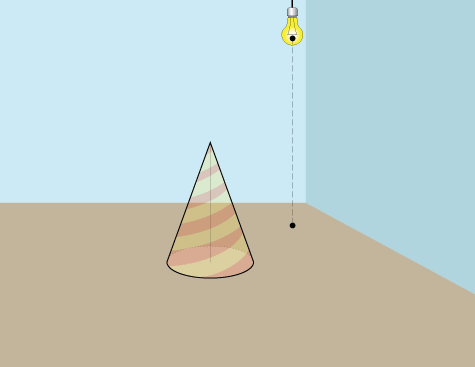
Have all construction lines in place (axis of symmetry, bottom oval)

Draw a line from the light ground mark and the bottom of the axis of symmetry
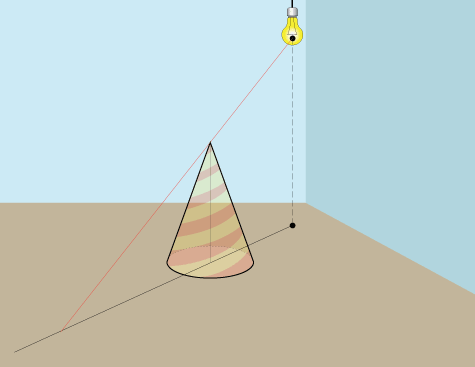
Draw a line from the light through the top of the cone to the ground line.
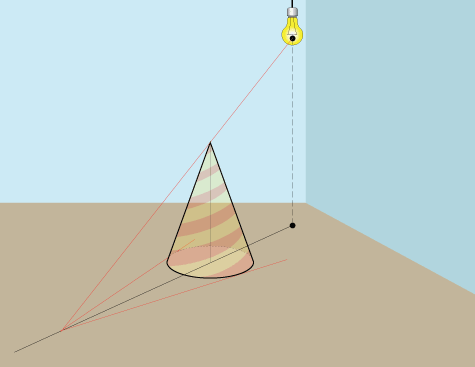
Draw lines from he point of the top's shadow through the widest parts of the oval
The shadow is done!
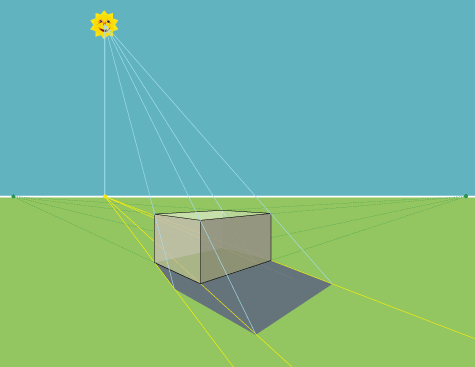
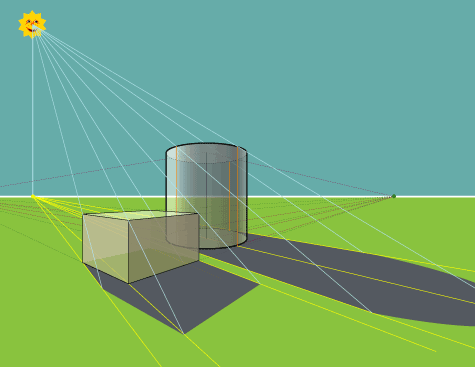
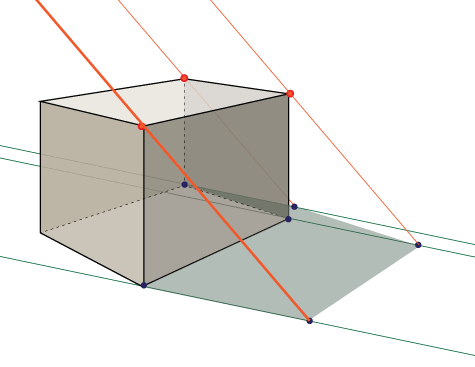
natural light

Place an object on a ground.
Define HORIZON line.
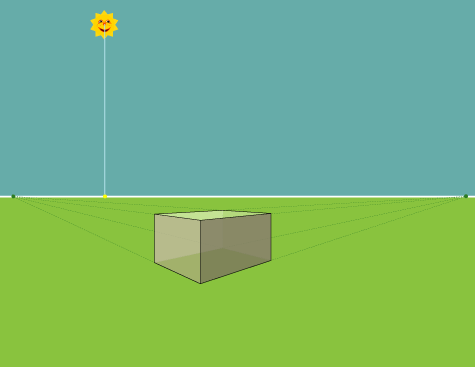
Because the Sun is so far away - we mark its position reference point on the horizon line.
Just draw a straight line down.

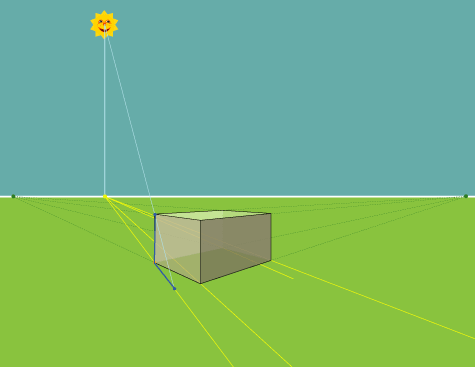
From the Sun reference point draw a line through a bottom corner of the box.

Then draw lines through each bottom corner.

From the light source - draw a line through the top corner of the box until it reaches the ground line.
That will start defining the area that is blocked from the light source.
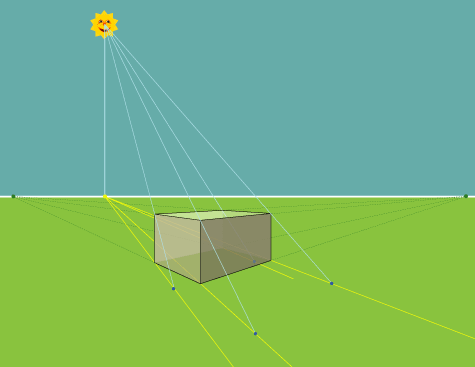
Draw the rest of the lines from the light source.
Mark the crossing points.
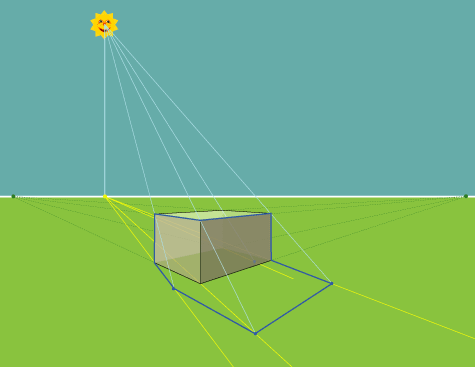
Connecting all points will create a shadow outline.
Shade the shadow.
It is usually getting lighter as it gets further away from the object.
...